Does your family enjoy watching fireworks on the Fourth of July?
Do you enjoy learning fun ways to paint?
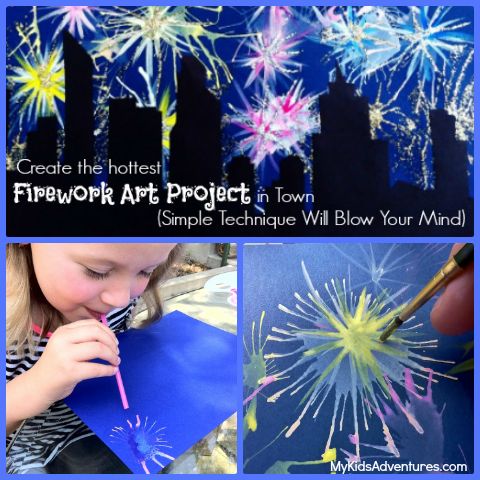
Capture fun memories and create the explosive effects of fireworks with this fun and easy art project.
In this article, I’ll show you how to use a fun, unique painting technique to paint a city sky filled with fireworks. Your one-of-a-kind piece of art will make a lasting memory of the spectacular nighttime display.
Why Paint Fireworks?
Independence Day is a national holiday celebrated every year on the fourth of July. Fireworks have long been a tradition to celebrate the birth of our country. Many families celebrate with fireworks at home or gather to see large firework displays in stadiums or parks.
Fireworks are always fun and light up the sky with booming excitement. The fantastic display of colors can take your breath away and create quite an experience for the whole family to enjoy.
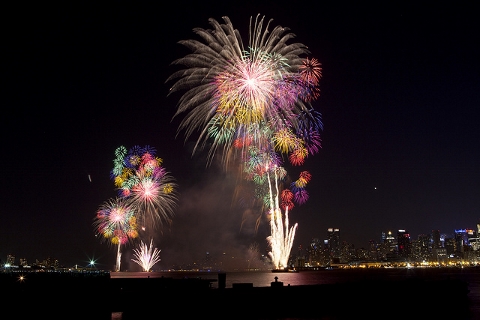
One of the largest displays of fireworks in the United States is the annual Macy’s 4th of July Fireworks show in New York City.
You can watch the whole show in about a minute in this time-lapse video.
As entertaining as fireworks are – they are over quickly. When the smoke clears we are left with an amazing experience so why not have recreated the fun by painting fireworks!
Now onto the Fireworks Painting!


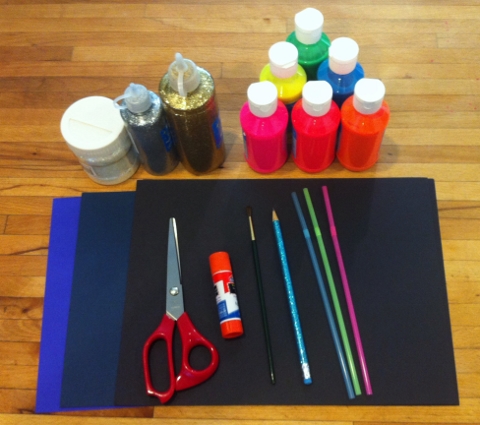
You Will Need
- Dark colored construction paper, including black
- Bright colored tempera paint
- Small paint brushes
- Straws
- Pencils
- Scissors
- Glitter Glue
- Container or bowl of water
- Paper towels
Preparation Time
10 minutes to gather supplies and set up
Activity Time
30 minutes to paint
Time to allow paintings to dry overnight
5 minutes the next day to finish putting the painting together
Location
Any table or work area inside or outside.
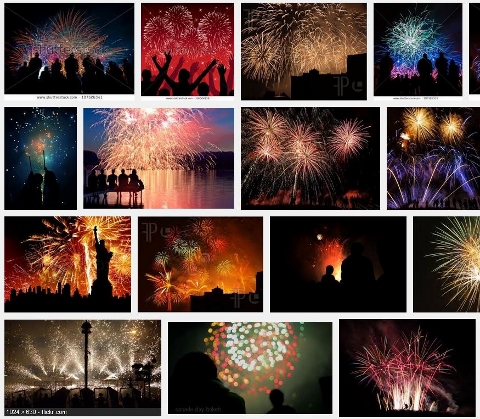
Even if you don’t have a chance to see a live fireworks display you can find plenty of beautiful fireworks as inspiration with a quick search on Pinterest or Google.
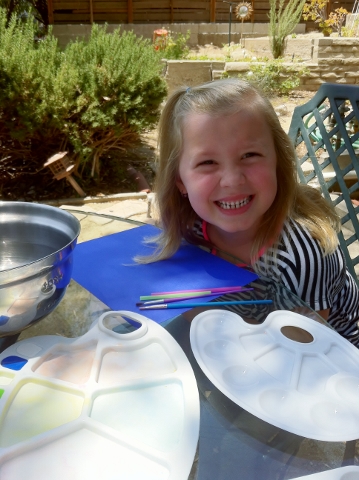
1. Gather Your Supplies.
Gather your supplies needed for this project and head to your work area.
2. Prepare to Paint.
- Fill a large bowl or container with water to use for mixing with paint and cleaning brushes.
- Squeeze out a small amount of the colors you would like to choose on a small plate or paint palette.
- Cut your straws in half (yes we are painting with straws)!
- Choose a dark-colored piece of paper for your sky (you will need a piece of black paper later so be sure to set an extra one aside if you choose black for your sky also).
- Grab a few extra sheets of paper to practice on and experience different ways of painting before creating your final piece of art. This technique can take some getting used to.
3. Mix Your Paint.
Mix the colors that you would like to use together. Add some water to the paint to allow it to easily drip on the paper. Ideally, when you sweep your brush through the paint and hold it above the paper a large drip falls from the brush.
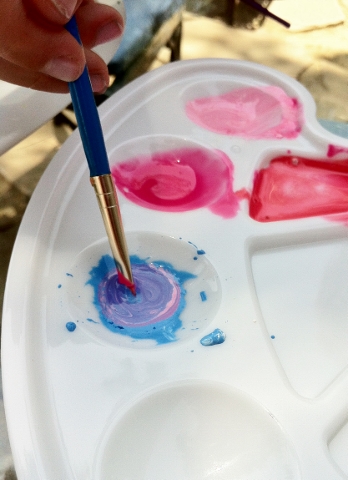
Play around with how much paint and water to mix together. Part of the fun in learning this process is playing with your paint.
4. Drip Paint on the Paper and Blow!


- Drop enough paint on the paper to create a small puddle of paint.
- Stand up, take your straw and blow on the paint to spread the puddle.
- I found that a short burst of air in the center made a shape that was more round.
- This can take a little practice, so have fun!
Remember that fireworks are not perfect so have fun and fill the sky with colorful explosions.
It’s ok if they don’t turn out exactly how you plan, that’s part of the fun. Seeing what different results you get.
Use different amounts of air, paint, water, etc. Notice how this changes how the paint behaves.
Use the straw at different angles and note how it changes the shape of your fireworks.
Join your child and paint along with them. We took turns blowing the paint around the paper together. Encourage each family member to create their own firework painting.

You may leave your fireworks just as they are or add a little detail with your brush using the next step.
5. Using the Paintbrush for Details.
If using the straws to “paint” your fireworks is a bit tricky, you can also use these steps to paint one with a brush.
")
- Using your brush with paint, start by painting a simple star shape.
- Start with your brush in the center and stroke outward.
- Continue building as many brushstrokes as you would like.
- Layer colors to create a colorful starburst firework.
You can also use the brush to add these types of brushstrokes to the centers of your fireworks for added detail.
")
Set your finished painting aside to dry.
6. Illuminating Your Fireworks.
It’s time to light up your fireworks!
We all know that fireworks have amazing shimmer and sparkle. What better way to finish these fireworks than with glitter glue!
Once your paint has dried, add some finishing touches and extra sparkly details with glitter glue.
")
Allow your glitter glue to dry overnight.
7. Framing Your Fireworks with a Silhouette.
Now that you have a sky filled with fireworks, it’s time to create a setting to frame your fireworks.
What is a silhouette?
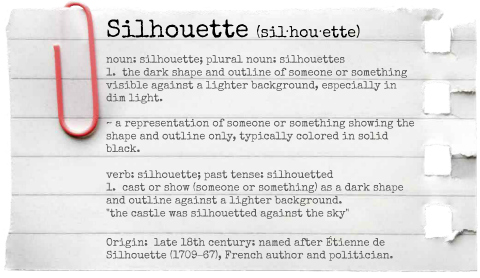
Most firework displays are behind buildings, in the water, or at a distance to be safe for everyone. This creates an interesting silhouette when the night sky lights up and leaves the objects around it in shadow.
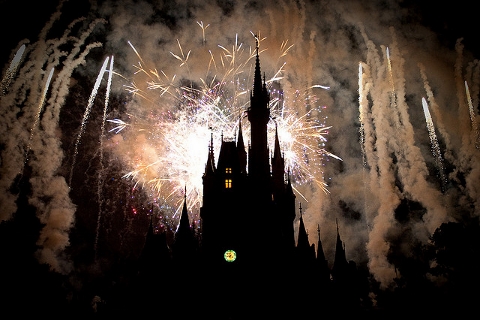
Did you guess Walt Disney World? This is Cinderella’s castle in silhouette!
What about this famous couple, can you recognize who they are by their silhouettes?

Any guesses?
This is our President and First Lady Obama. President Barack Obama and First Lady Michelle Obama watched the fireworks over the National Mall from the White House on July 4, 2009
8. Design Your Silhouette Cityscape

Fold a sheet of black paper in half horizontally and cut along the fold. This will create two long strips for each of you to design your own cityscape. (Design one along with your child to frame your fireworks).
Use your pencil to trace your imaginary city or look for inspiration at different cityscapes. The shiny effect of the graphite pencil will make it easy to see your pencil lines.
")
Carefully cut out your silhouettes. You may have to help a young child with the cutting.
If you turn your cityscapes over once you cut them out – you won’t see any trace of your pencil lines and you’ll have a nice clean silhouette.
You can add some details to your cityscape with glitter glue if you’d like. My daughter decided the turn the lights on in one of her buildings and filled the windows with sparkle!
8. Assemble Your Fireworks Painting
Apply glue to the back of the cityscape silhouette using the glue stick and attach it to the bottom of your fireworks painting.
The cityscape silhouette adds depth to your fireworks and creates a setting for your colorful fireworks display.
")
Voila! A fabulous fireworks painting as a reminder of that spectacular night!
Some Final Thoughts…
After the real fireworks are over, this project is a fun way to explore new painting techniques and spend some creative time together as a family.
Creating art around fun and exciting experiences gives us a chance to create memories to remind us of those special times we spend together celebrating important holidays or events. You get the added bonus of one-of-a-kind piece artwork to have on display!
What do you think?
Are you attending a large fireworks display this year? Or maybe having some small fireworks at home? Would you like to capture those memories with a fun piece of art? Do you see the creative possibilities of using unusual items like straws to paint?